Generally, images are in all eLearning projects and sometimes you might want to change the image from its standard look. A lot of people use Photoshop or Illustrator to edit their images but if you don’t have access to either of these you can use PowerPoint to do some simple editing to your images. In this post, I’ll show you three ways to edit an image using PowerPoint. Once you’ve edited your image, you’ll be able to save it as a new image (right click on the image and select ‘Save as Picture’) and import the new image into your eLearning project.
Cropping an image to a shape
Most of the time, images are square or rectangular and it doesn’t matter if you shoot your own or use a stock image. There might be times when you want the image to be another shape, maybe to fit in with a particular design or layout that you’re using.
Here’s a before and after example where I’ve cropped an image to a circle:

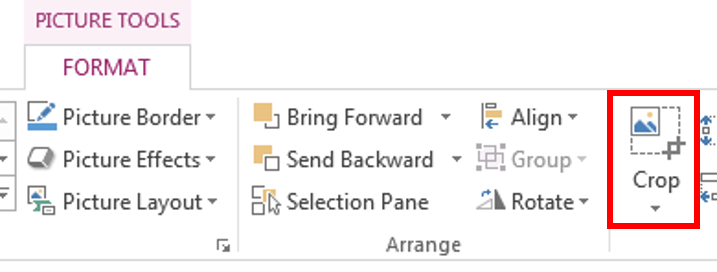
You need to start by clicking on the image to select it. Then, because pictures have formatting options a ‘Format’ tab will appear. Click on the tab and you’ll see all the options available for formatting the picture. The cropping option is on the right:
When you click on Crop, you’ll see some black bars around the image and you can drag them to remove parts of the image:

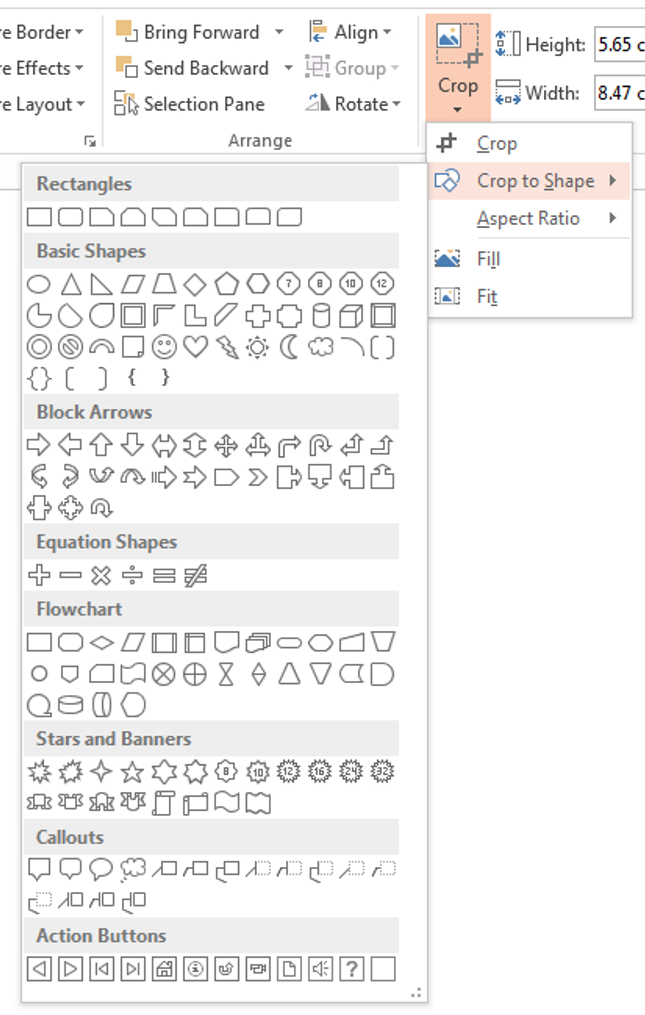
However, the image still remains a rectangular shape. But if you click on the small arrow under Crop, you’ll have the option to ‘Crop to Shape’ which will allow you to crop the image to any of the shapes that are displayed:
Tip: when cropping to a circular shape, I crop the image to make it roughly a square first and then crop to the circle shape.
Once you’re happy with the cropping, save it as a new image. Then it’s ready to import into your project.
Applying artistic effects to your images
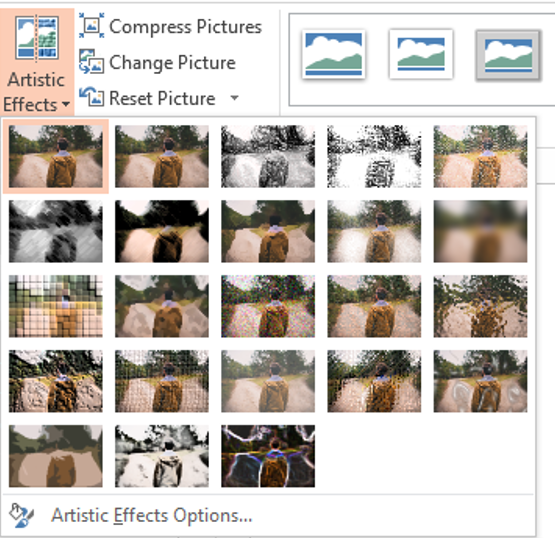
Sometimes you might want to use an image as a background but you don’t want it to dominate the slide, it just needs to set the scene. Again, with the image selected and in the ‘Format’ tab look for ‘Artistic Effects’ and click on the arrow.
As you can see, there’s lots of options available and if you hover over each effect you can see what they are and how your image will look (I like using the blur effect). Once you’ve applied your effect, save it as a new image ready for inserting into your project.
Tip: For consistency, use the same effect throughout your module.
Removing a background
There might be times when you have an image but you don’t want to use all of it, here’s a before and after example:

Again, in the ‘Format’ tab of the image look for ‘Remove Background’ (on the left) and click on it. Anything that turns pink will be removed and there’s also options for manually removing and keeping parts of the image.
Tip: For this to work well, you need to have good contrast between the foreground and background.
There you have it, three ways of editing an images using PowerPoint. Give them a go and you’ll be creating new images for your projects in no time!
How else do you use PowerPoint to edit images? Let me now in the comments area below.
