Using imagery in your eLearning design is an additional way for you to communicate your message. You know the old saying, a picture tells a 1000 words!
Let’s face it, the perfect image can help you convey your message much more succinctly than a not-so-perfect image. But we know that sometimes the perfect image won’t fit on the screen, or in the space our slide design requires. My blog post this month gives you some simple tips for manipulating the images you’ve decided to use in your course, and ultimately helping you to ‘fit’ them into your overall course design.
Let me start by giving you a few time-saving keyboard shortcuts, who doesn’t love a good keyboard shortcut?
1. Double click any image (or shape / object) and the editing toolbar for that object appears, in our case, the Picture Tools:
2. CTRL+D – duplicates any object / selected objects (it’s quicker than CTRL C; CTRL V). This will create the copy just a little offset from the original
3. CTRL+drag – duplicates any object, allowing you to position where you want
4. CTRL+SHIFT+drag – duplicates any object keeping it aligned either horizontally or vertically with the original – this is a great one for alignment!
5. Resize using corner image handle – maintains the aspect ratio of the image – this means your image won’t end up squashed:

6. Resize+CTRL (using corner image handle) – will maintain image centre, and will resize larger or smaller on all sides
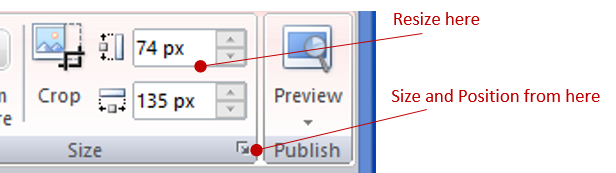
7. Resize using Picture Tools – this is handy if you want to resize by pixels. You should notice that if you resize the height, then the width will resize also. If the height and width are not sizing simultaneously, then you’ll need to check if the aspect ratio is locked.
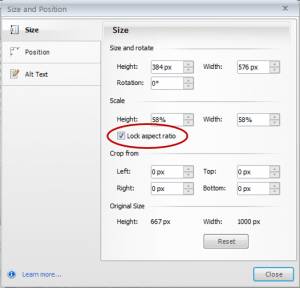
To check if your aspect ratio is locked, click the arrow to show the Size and Position box
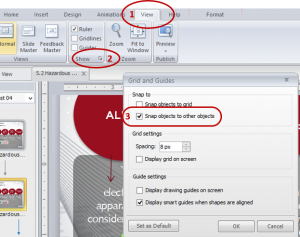
8. “Snap objects to other objects” – One last setting you’ll need to have turned on in your presentation, which really helps with alignment more than anything, and that’s the “Snap objects to other objects” setting. To turn this tick box on, select View / Show to bring up the Grids and Guides dialogue box, and tick the box “Snap objects to other objects”:
I think that’s it for handy screen and keyboard shortcuts, now onto manipulation tips!
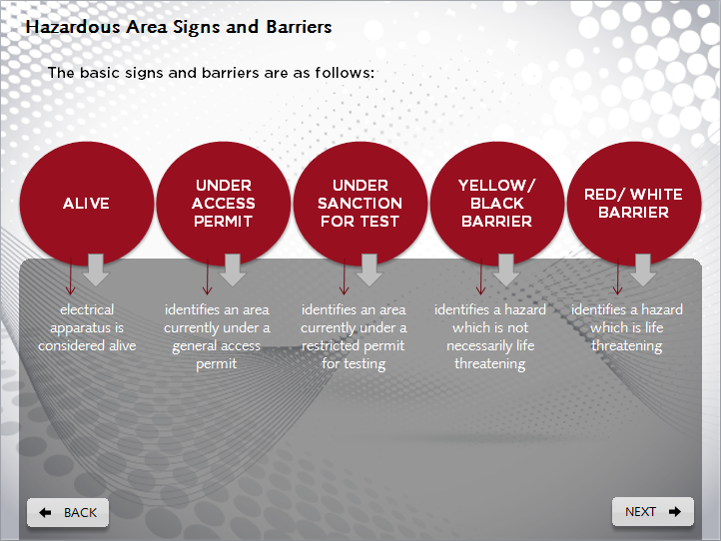
An example I came across most recently was imagery of five different types of hazardous signs and barriers, where the client had given me images for three of the five examples, leaving me to source the other two. It wasn’t too hard to find the images, however making them all fit into the design stipulated by the size and shape of the others proved to be challenging.
Firstly, with the images supplied by the client, I decided to determine the best width and height to compliment the screen design. In this case I chose the consistent width of the circles:
I re-sized all the images to the same width as the circles, making sure that the aspect ratio was locked. I then cropped the height to match the height of the smallest image.
You may have noticed that while cropping images, the crop will jump by 3 or 4 pixels, and you only want to crop 1 pixel. Here is my tip of the century for cropping images consistently!
Start by aligning all the images – in this case, let’s align all the bottoms; select the images, then select Align / Align Bottom:
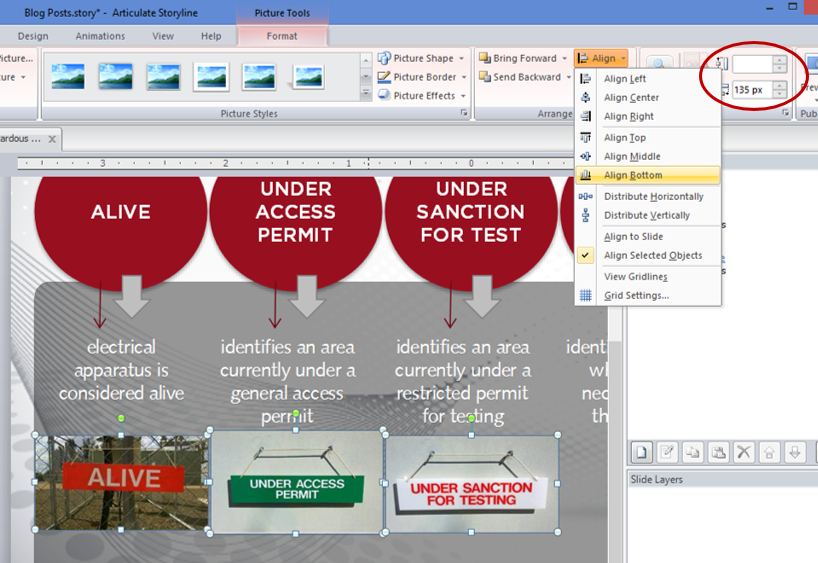
You can see by the absence of a figure in the height box that we’ve got some cropping to do! My smallest image was the image on the left, so I want to crop the top of the other two to the same height. Select the first image and select the Crop button from the toolbar. Because we’ve set the presentation to “snap objects to other objects”, when your crop reaches the same height as the small image, you’ll see your image ‘snap’ to the size of the smaller one:
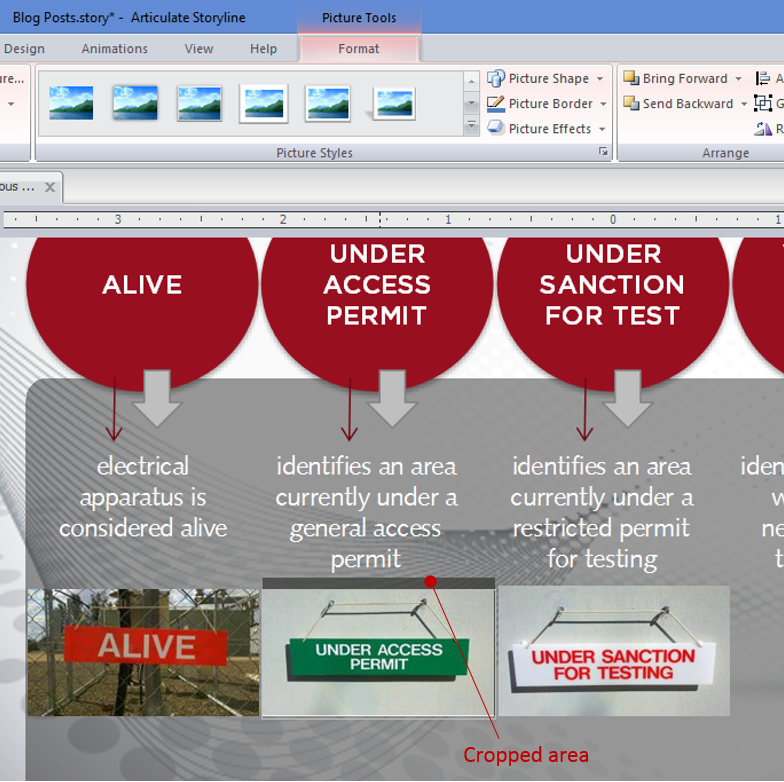
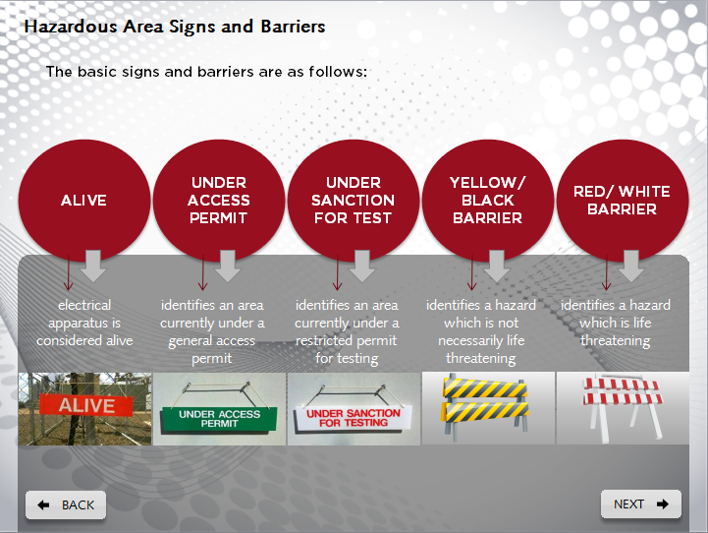
Apply the same steps to the remaining image, and the two new images that were sources, and you get something like this:
My final tip for cropping images is the situation where you only want to crop one pixel of the height or width – if you hadn’t noticed, I really like consistency! To do this, I like to align the image to the edge of the slide (by selecting only one image, use the Align tool, and that will align to the edge you choose). Then I nudge the image the number of pixels whichever way I want to crop it and select the crop tool. If you’ve got your “snap objects to other objects” turned on, the crop will magically ‘snap’ to the edge of the slide, and be perfectly sized for your requirements!
Using these tips, you’ll have more control over your image sizes, and be better equipped to fit most images into your slide designs.
I hope you’ve found these tips useful, and if you have any questions, be sure and leave me a comment below.
