When developing eLearning modules, time is a very valuable commodity and sometimes there doesn’t seem to be enough! I’m all for saving time whenever I can, so here are five things that will save you some precious development time when using Articulate Storyline.
1. Master Slides
If you have objects common to multiple slides, creating some master slides will save time because you won’t have to create the same layouts over and over.
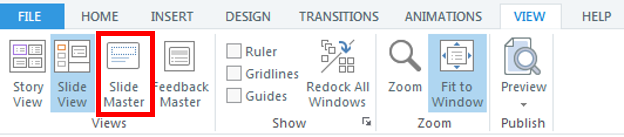
Go to the View tab and select Slide Master.
Next you’ll see a ‘Master’ slide and several ‘Layout’ slides. Anything applied to the master slide will also appear on each layout slide, whereas anything inserted on a layout slide only appears on that layout. You can have as many master and layout slides as you need and these slides can also have layers and triggers on them (saving you more time).
After you’ve created your master slides, you can select the one you need each time you insert a new slide into your project.
Extra tip: There’s also a Feedback Master which allows you to customise feedback layers in quiz questions
2. Format Painter
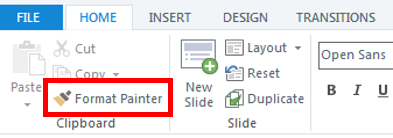
This is one of my favourites and allows you to copy the formatting from one object and apply it to another object of the same type. Format painter is located in the Home tab, just select your object and then click on Format Painter.
Using format painter you can transfer fill colour, outline colour, shape effects, fonts and font colours. It will even apply any states you’ve created for an object! If you double-click on format painter, you can apply the formatting to multiple objects of the same type.
Extra tip: In the Animations tab, there’s an Animation Painter button that copies any entrance and/or exit animations from one object to another.
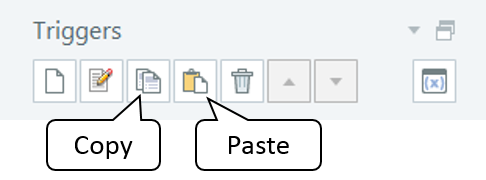
3. Copy and Paste Triggers
Sometimes you might have several objects on a slide that have similar triggers attached to them. In Storyline 2, you can copy a trigger from one object and paste it onto another. Just look for the Copy and Paste buttons in the Trigger panel.
You may need to adjust part of the copied trigger but using this feature is quicker than creating every trigger you need from scratch.
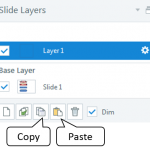
4. Copy and Paste Layers
You can copy and paste layers on the same slide but what’s really great is that you can now copy a layer on one slide and paste it on another slide in your project! Again, look for the Copy and Paste buttons but this time in the Slide Layer panel.
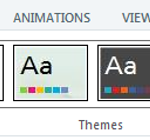
5. Custom Colour Themes
Often during a build, you’ll be working with a particular colour palate – usually from the branding guidelines. So rather than creating the colours you need each time you need to use them, why not set up a colour theme? Go to the Design tab and the Colors dropdown.
Then select Create New Theme Colours. You’ll then have several Text/Background and Accent colours that you can set based on the colours you’re working with. For more about colour themes, here’s some information for the eLearning Heroes Community: Working with Theme Colours.
Extra tip: You can also set up theme fonts with the fonts you need for your module.
If you want to learn more about Articulate Storyline 2 then you may be interested in the Articulate Certified Training Program.
What Articulate Storyline time savers do you use? Please share them in the comments below.
